Ionic + Android environment setup tutorial on Windows
This post is in response to a request made by a developer in addition to my talk Hybrid apps with Ionic. You can start developing now!.
So let’s get straight to the point.
-
Ionic and Apache Cordova is required, so if you haven’t installed them yet, let’s go.
-
Both are Node packages and we need to install them. Download it from https://nodejs.org/en/download.
-
Do not uncheck NPM.
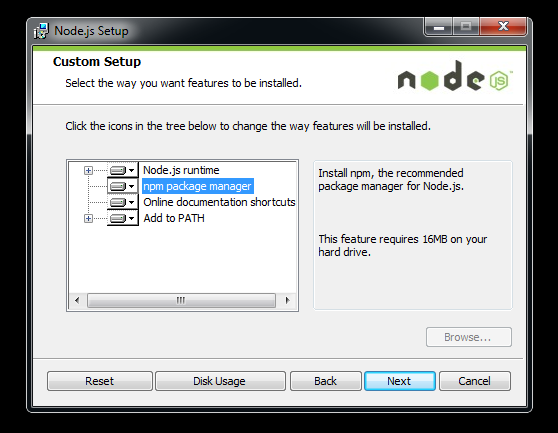
Does not know what Node and NPM are. Read: Node.js vs NPM: Understanding the Differences.
-
-
With Node installed, now let’s move on, open the terminal and install Ionic and Cordova.
- Execute the command:
npm install -g cordova ionic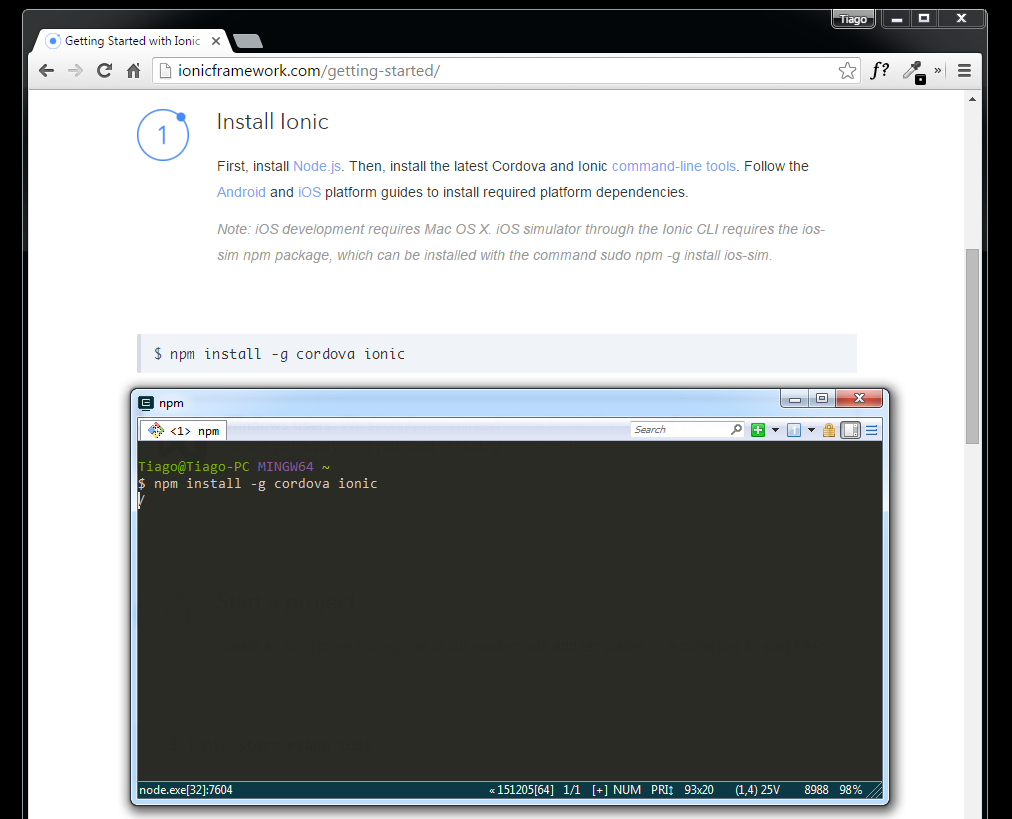
-
Let’s begin setting up the Android environment. Let’s install the Java JDK.
-
Go to Java Downloads, select JDK download, and choose the version compatible with your OS (32 or 64 bits). Check the installation path; it will be necessary for the next step.
-
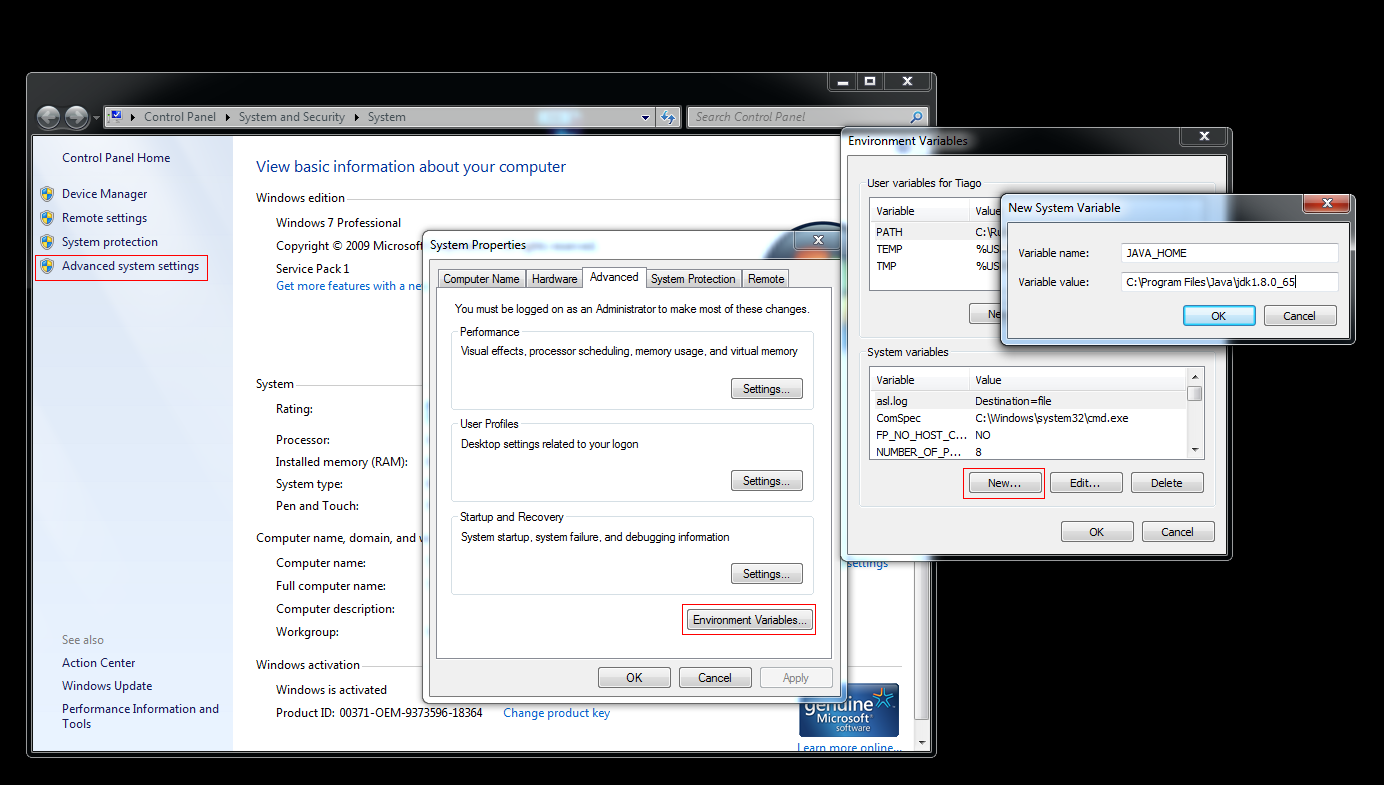
Now we’ll create the
JAVA_HOMEenvironment variable in Windows, open the System Panel with the windows + pause/break keys or go toControl Panel / System and Security / System. -
Click on
Advanced system settings. -
Select
Environment Variables. -
Select
New. -
In the new window, enter
JAVA_HOMEin the variable name, and the path where you installed the JDK in the value. For instance,C:\Program Files\Java\jdk1.8.0_65. -
Save.
-
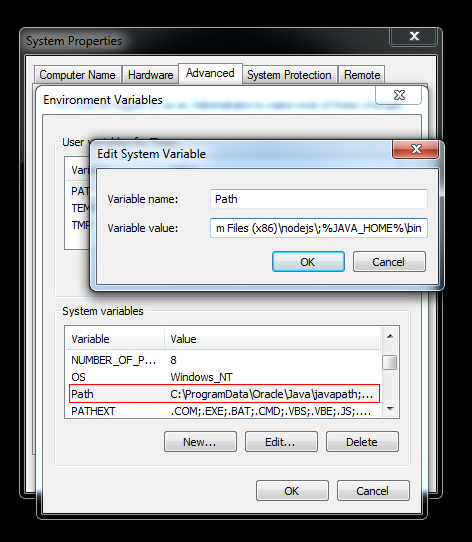
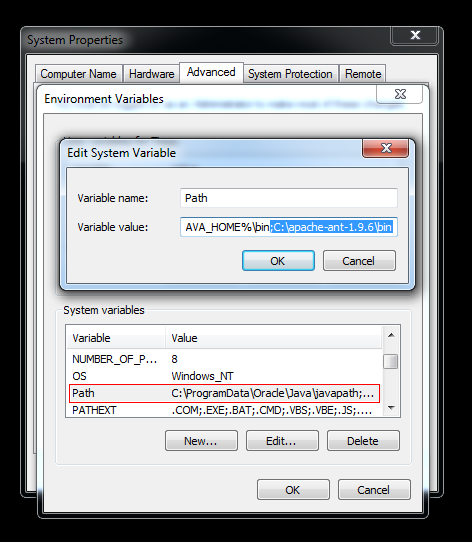
Select the
Pathvariable, and click on edit, in the variable values field, add;%JAVA_HOME%\binto the end of the string. Don’t forget the;. -
Save.
-
-
With Java configured, we will need Apache Ant, he one responsible for the build. Download it at Ant Download.
-
Once the download is complete, extract the directory to the
C:. -
Once again we need to update the
Pathvariable to add Ant. Open the Windows environment variables. -
Select
Environment variables. -
Select the
Pathvariable and click edit. -
Add the path to the Ant bin folder, for example
;C:\apache-ant-1.9.6\bin. And don’t forget the;. -
Save
-
-
The next step is the installation of the Android SDK, the API which provides the libraries and tools needed to build, test and debug Android.
-
Download it from the Android SDK, select the .exe (Recommended).
-
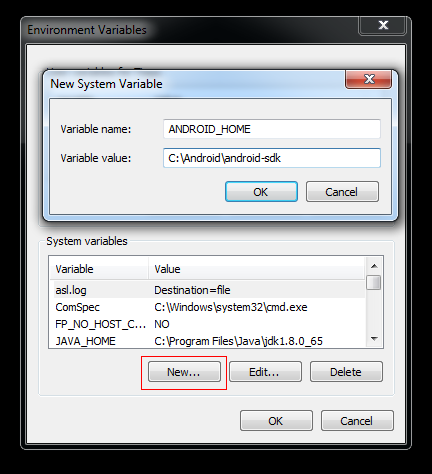
Once installed, we need to create the
ANDROID_HOMEvariable, required by Cordova. Open the environment variables. -
Select
Environment variables. -
Click New.
-
In the new window, in the variable name, enter
ANDROID_HOME, in the variable value, enter the path to theandroid-sdkfolder you just installed, for instance:C:\Android\android-sdk. -
Save.
-
Going back to the environment variables, select the
Pathvariable and click edit. -
Add
;%ANDROID_HOME%\tools;%ANDROID_HOME%\platform-toolsto variable value. -
Save.
-
We’re almost there, now we need to install the Android packages. Open the
SDK Manager.exefile, located inside theandroid-sdkfolder. -
By default Tools/Android SDK Tools Tools is already installed. If for some reason it isn’t, select it.
-
Check Tools/Android SDK Platform-tool, Tools/SDK build-tools (one version above 22)
-
Under API select the same version you selected in Build Tools.
-
Under Extras, check Google USB Driver, which is required to debug directly in the device.
-
Click install.
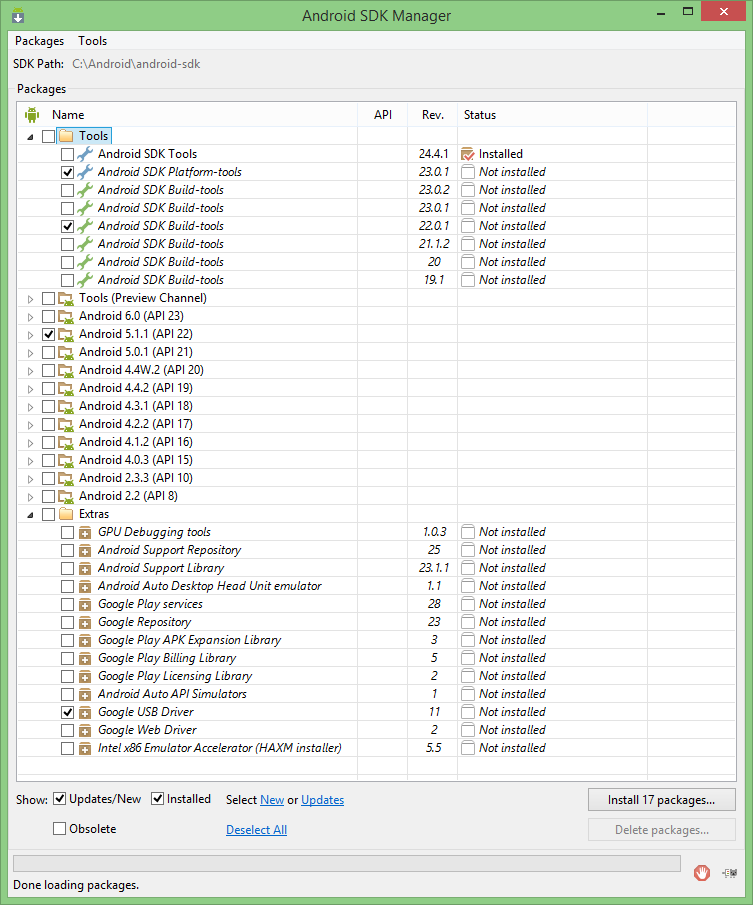
-
Once the installations are finished, our environment is ready.
-
-
Now, let’s add the Android platform to the app.
-
Open the application directory via the terminal.
-
Run:
ionic platform add android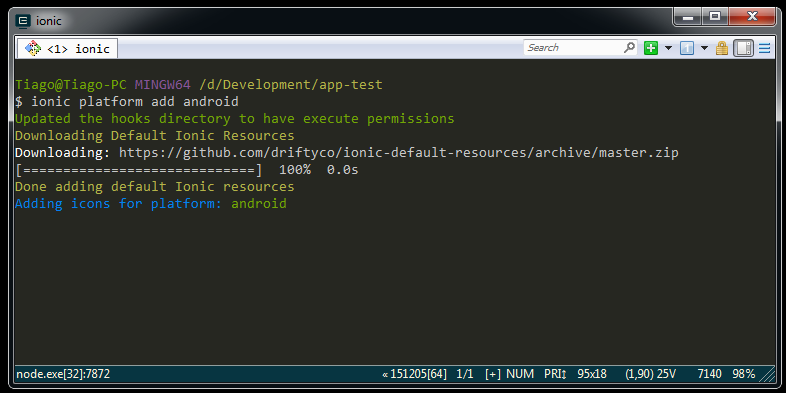
-
-
It’s time to try the
.apkbuild.-
Run
ionic build android -
Once the process is complete, the generated
.apkpath is displayed in the terminal.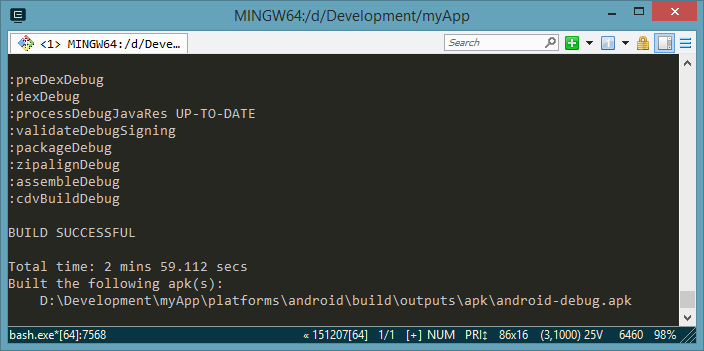
-
-
You can also debug the app direct on the device. Connect the device via USB cable, make sure you have enabled USB debugging on the device.
-
Run
ionic run android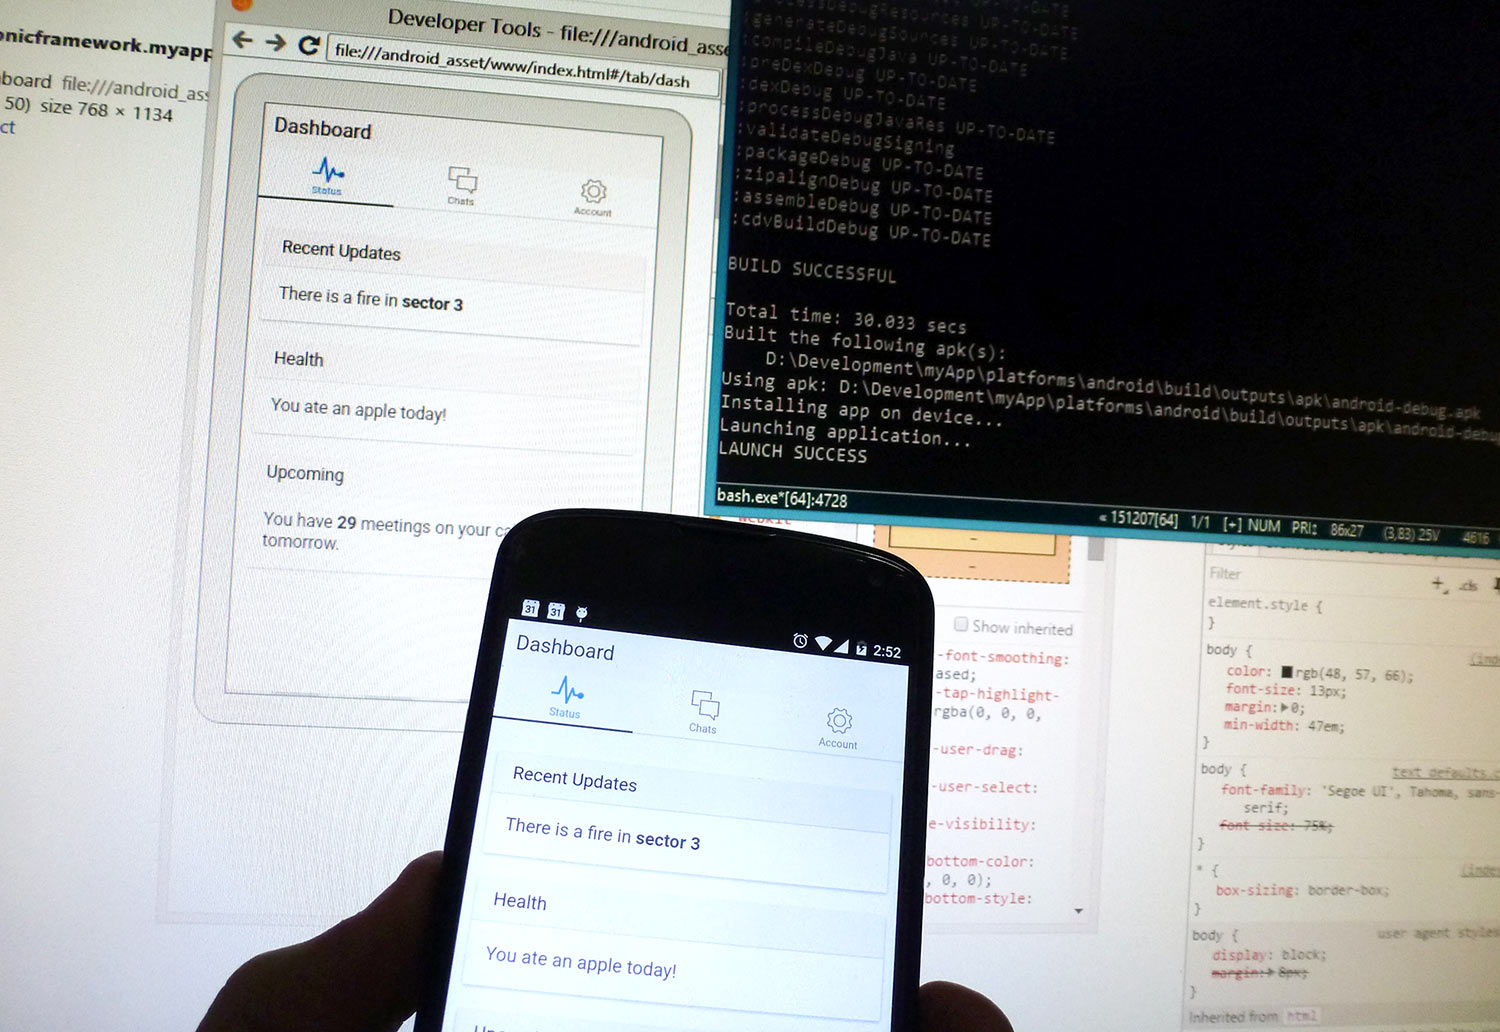
-
That’s it, happy coding!